Showing posts with label paint. Show all posts

Tuesday, May 01, 2018

My Handpainted Library "Wallpaper" in Photos

Happy May Day everyone! Only a few days until the Crafting A Patterned Home Book Launch Party here at our antique farmhouse. I hope to see some of you here. Photographer Rikki Snyder will be here too to greet you. And I have some friends helping out too. Here is the Eventbrite site for more information. It is FREE. Books and some other things will be for sale (hint, hint - Mother's Day is coming.) You do not need a ticket but I thought it would give me an idea if anyone is coming

You all have seen the cover of my new book Crafting A Patterned Home. It features the handpainted wallpaper I did back in 2003. This was before I had a digital camera and before this blog (which BTW started in 2006). But I did have a regular camera and amazingly so - I documented the steps of handpainting the wallpaper. Please excuse the lousy photos - they will help you get the idea. 

I'm not a fan of stenciling - although I know many people love to stencil. I've tried it but the paint always seeps under the stencil and I have a real mess. My handpainting technique is kind of the opposite of stenciling. I use cardboard templates and with a pencil, trace the templates directly on the wall. Here are the templates I made out of Fedex envelopes.


Here is the room before the painting began. 


I began at the corner of the room and traced the center cross along two walls. Then I filled them all in with red paint. 


Next I took the largest shape - the square with the points coming out four sides and traced that in the center of each opening created by the crosses. I painted them an apricot color.


Next I traced the circle motif inside each large square. I painted them in alternating shades of butter yellow and turquoise.


Lastly I added a pointy cross shape to the center of each circle in a pretty orange shade. After all the colors were laid on, I outlined the shapes in black with a small liner brush. 


Here is the room completed. All the directions and templates are in my new book Crafting A Patterned Home. I know my color choice may be too out there for most but with a little experimentation, you can develop your very own colorway. 


In addition, you can find a digital version of this wallpaper design available as wallpaper, fabric or giftwrap in my Spoonflower shop here. It comes in two sizes - as seen here and at half scale

Wednesday, July 06, 2016

Pottery Shed Exterior Decoration

When Kevin fixed up the old garden shed to become my new pottery throwing studio, I had him replace 3 rickety windows with my old kitchen window that he had just also replaced. The old kitchen window was single paned and just above my sink. It had begun to rot and I couldn't even close it tightly anymore. It still had a bit of use left in it though so in it went. 


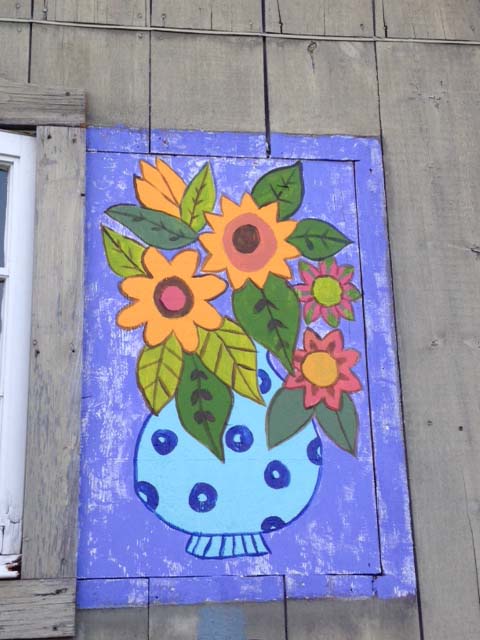
Because the window took up less room than the 3 windows, he filled the space with some plywood. I had to think of something to do with the two areas of un-aged raw plywood. I took inspiration from Maud Lewis' folk art inspired exterior paintings of her home in Nova Scotia. You can watch a short film about her here

I had never painted decoratively on plywood before this summer. It has a rough crinkly texture so it is hard to work like I usually do on flat smooth surfaces like pottery or paper. I decided to just go for it and see what happened. 

First I primed the plywood with basic white. I decided to paint flowers in pottery jugs because I'll be making vases inside the little building. Someday - when all this other work gets done. 

Here's a progression of the first vase with flowers. 


Then I had an accident with some green paint by getting off the ladder without closing the lid on the paint. Big oops. I will have to try to match the color of the shed - which won't be easy. It is stained and it is aged. I'll give it a try though. For the final photos, I can always stick a giant sunflower in front of the oops. 


This is what it looked like after Day One. I like how the blue background color worked - I left some of the white primer showing through - going with the texture of the plywood. 


On Day Two, I had more confidence in what I was doing - standing on the third step of the ladder flinging paint on. I had to hurry because it was late in the day so I didn't take any process photos. Here's the second painting. My sister Laurie thought they were shutters so maybe that is what I will call them. 


I had to hurry to finish before the sun went down. Here are 4 process photos of decorating the vases and then lining the flowers to make them pop. 


Here's the finished look with the giant oops that I will have to do something about. 


I am happy the way it is shaping up. Now to plant a little sunflower garden below the windows now that I don't need to have the ladder in there anymore. 

Sunday, June 26, 2016

The Garden Shed Project - Exterior

This week, I've continued working on the the new version of the Garden/Tool Shed. I scraped the entire exterior. What a job - I hate scraping peeling paint but someone had to do it! I washed it all down - with a bleach solution trying not to get it on the plants. Then I primed and painted the entire thing in an exterior basic white paint. What a job. 

Next I had to tackle the front porch section. This is what the floor looked like before. Notice the brambles growing up through the floor. It was a nightmare.


The little railing looked almost as bad. More bleach-y water and I was ready to go. 


I painted the floor a pretty mossy green - two coats did it. I painted the railing too. Two more coats of white exterior paint. I have been a painting maniac.

Then for the fun part - decide on a new door color. I had some leftover exterior oil based floor paint in a super fun color called Peony from Benjamin Moore. Two coats and the paint can is empty now. That is a good feeling. I think I used it on the stairs in my studio in 2010. 


I love how the moss green looks with the peony pink. 


Nice contrast of complementary colors although this photo is a little brighter than it really looks. 


I cleaned out the little garden that I had planted a few years ago and planted some pink annuals and the Heavenly Blue Morning Glories that will be all over the archway by September. It is so much fun to plan these projects in my head and then visualize what they will look like in a couple months. Oh the possibilities. Now we really need some rain!

Friday, June 24, 2016

This Week on the Farm - Progress

It's been a busy week here on the farm. Julia is finished with school for the year. Next year she will be a senior. I can't believe it. 

I finally finished the floor in the shed. Here's how the floor looked on about Monday. 


But before that, I forgot to show you the ceiling after 6 cans of white spray paint. I like how it looks. It almost has a blue cast to it which I think is from the reflection of the blue walls. I'm really happy I decided to paint it because the colors of the raw wood and the metal roof were really bothering my aesthetic sensibilities. 


I played with the idea of leaving the flowers on the faux rug just as they were but then decided to keep going with my style of outlining. (Thanks for all your input on that!) Here is a photo of half way done outlining. The flowers really do pop once outlined. Although it takes a steady hand, I like to make the lines thick and thin to give it more of an artistic touch. Interesting how the blue walls are changing the look of the colors on the floor. 


I applied 3 coats of a polyacrylic over a period of days. It will protect the floor. Although this little shed won't be walked in a lot, I thought it good to protect. There are only screens in the shed and because of the dirt that happens on a farm - along with the dirt from the dirt road, it will get dusty. 


Now I am thinking about doing something about window shades just so I can keep the dirt at bay during the off season when I won't be going in and out so much. Decoratively of course. Another opportunity to decorate with pattern! 

I'm also working on painting a little bookcase. I had some leftover yellow paint from the studio door and thought it would really brighten up the space and provide some contrast. My experience with yellows and oranges is that they don't cover well so it will be at least 2 coats of paint. Man my studio is a real disaster. That is how I roll - chaos all over the place. Serious chaos - everywhere I look. It's a good thing inside my head there is some order. Have to get this place cleaned up for the Creative Retreat that will be here in just about 3 weeks. 


While we are talking yellow, check out this gorgeous kitchen in the color of yellow egg yolks. Glorious. See more over on Ben Pentreath's blog. It is one of my very favorites ones to read. He usually posts every Sunday and his photos of England and the UK are fabulous. He also has a new book coming out.  It is called English Houses: Inspirational Interiors from City Apartments to Country Manor Houses. (affiliate link) Can't wait to see it because his last one was so gorgeous and inspirational. 

Bright yellow is really having a moment in the interior world

I also have been in the garden pretty much all this week when not at the Tuesday Farmers Market - planting annuals, cleaning up the little gardens around the house and sweeping up debris. Today is going to be hot along with this weekend. We do desperately need rain. 

My friend Kay sent me this video. Pretty awesome. Tom Riccardi is a local guy and he is frequently featured in photos by Paul Franz in the local Greenfield Recorder. Fun to see a video though.  


Hope you all have a great weekend. Get outside and enjoy the warm weather and long days. 

Tuesday, May 10, 2016

Progress on the Sunflower Bedroom + Two Videos

I've been working away on the Sunflower Faux Wallpaper in the bedroom. It is pretty much finished although there is a small section under the long row of windows that I didn't paint. We have been living in such chaos upstairs with things ripped apart that yesterday I spent the day cleaning it up some and polishing the chests of drawers. When you heat with wood, it really dries out the furniture. It all looks much nicer now. 

This project ended up being more time intensive than I thought it was going to be. First, I painted the walls over. Then I decided to do the woodwork which meant hours of painting little wooden mullions. I made a little video yesterday of how I clean the windows once they are dry. 

Years ago, a friend showed me this trick. It saves hours and the little bits of dried paint clean up easily with a vacuum cleaner. 


Here is another video about how I finished up the flowers. 


I guess I have gone video crazy. I took them with my iphone mounted on this handy dandy gadget attached to my camera tripod. It works great. I'm going to keep practicing with the video on the iphone. There are things like Periscope that artists are using to share their work in progress. I've also been hearing about Facebook Live. Not sure if I am going to go there but seems like some people are having fun with it.  

Tuesday Farmers Market in Northampton this afternoon. Webs Tent Sale (I will have a booth) on Saturday. And Brimfield on Friday. Can't wait to be inspired and maybe pick up some odd things to use in the projects in my new book. Busy week. 

Hope you all have a great week. 

Wednesday, September 30, 2015

Easy DIY How to Print Faux Wallpaper Video by Kristin Nicholas on Houzz.com

Very happy to share with you all today a DIY video that is being featured on the Houzz.com website today. I taped it back in May when Rick and the team were here. 

If the player isn't showing on your device, HERE IS THE LINK for you to watch it


This video shows you how I printed the stairwell walls in our colorful farmhouse. I chose to demo this technique because it is so approachable and easy to do. Because we didn't have actual walls to demonstrate on, we used masonite boards. The one thing I forgot to say in the video is ---- If you screw up and your stamped print isn't quite right, you can easily just wipe off the print and try again. I have done this many times. Just make sure your surface is dry before you print again so that the paint doesn't run down your walls. 


Photo Rikki Snyder via Houzz.com
This technique doesn't have to be limited to walls. I used it to stamp the stairs in my studio as shown below. 


Photo Rikki Snyder

It's a quick technique and very inexpensive to do. It makes a great statement too. And you can design your very own motifs. Have fun with it! 

Learn more about decorating your home with handmade color in my book Crafting A Colorful Home available on my website here. Free shipping, bookplate included and free postcards. $27.95. 

Saturday, August 22, 2015

Loose Ends + Vincent at The Clark

You probably guessed it but I love to work. I love to make things and create products to share with others that they can then too make. When I was a kid, I was the one doing the making of the products that were out there for sale. I spent all summer sewing and stitching - it was heaven. Now it is the other way around - me designing the products for others to make.

There hasn't been much producing around here the past couple weeks. Julia and I have been out and about - visiting friends and relatives. Sure, I have worked a bit on my Chair Project but I can't say I have gotten very far or inspired. Julia goes back to school soon and she is excited about the new prospects of her coming junior year. I'm looking forward to her getting back and me getting back to work too. 


I've been craving work the past couple days but I am so distracted that I cannot get any designing or art done. I need my own time and space to create. Soon. It is happening soon. 

This past week, Julia and I have been taking advantage of some of the fantastic places to visit around here. On Thursday, we went to The Clark Art Institute in Williamstown, MA. There is a show called Van Gogh and Nature. If you are anywhere in driving distance to The Clark, GO. The show is there until September 13th. The catalog is available here although I did not purchase it. 


Wheatfield with Cypress Trees from The Clark website by Van Gogh
I asked one of the guards if I could take photos and unfortunately they were not allowed. These photos are from The Clark website. The paintings have come from all over the world and it is an astounding collection. Being an artist who sometimes works in oils, I wanted to look at the brush strokes. I was constantly being reminded by the guards to step back away from the paintings. Julia kept reminding me but the pull was too much for me. I am wondering how Van Gogh got the paint so thick. When I paint with oils, I cannot get as much texture as he did. Perhaps there is a oil paint thickener that I do not know about. (Found this - has anyone used it?)


Butterflies and Poppies from The Clark website by Van Gogh
Surprisingly, Julia enjoyed the exhibit too. We were there late in the day (hint: a guard told me it is always slow late in the day, so go then if you like to avoid crowds), and had lots of time to look around. Like any teenager, she was curious about Van Gogh's ear. And she was trying to figure out (as I was) how the heck he painted so many paintings in a year. I suppose it helped he didn't have a family to cook for and a house and farm to care for. I have read this bio on Van Gogh and maybe I should read it again.  

I asked Julia to chose her favorite painting in the exhibit. She chose this one which is from Paris' Musee D'Orsay. It is called Frittilaries in a Copper Vase. The very cool thing was that next to the painting was the actual vase that Van Gogh painted. It looked brass to me. 


If you enjoy art or color or nature - or all three - and you live close enough to get to The Clark - GO to see this exhibit before September 13th. I think it may be the art highlight of my summer. If you go, you might be able to take a ride on the Van Gogh bus! 


Tuesday, May 05, 2015

Fabric Painting Weekend Wrap-Up - Part 1

Good morning everyone. I made it through the weekend. The old farmhouse was clean and shiny and my guests arrived on Saturday morning bright and early. The first 2015 "Getting Stitched On The Farm" Creative Retreat was a huge success. Funny thing was --- it wasn't exactly about stitching - it was all about fabric and color and design. But you know what you can do with fabric, right? Stitch it. 

I had a full class of 6 women who came as far as Minnesota, Chicago, and many from the Boston area. Two of my students were "repeat offenders" - how incredible that they would come back and travel so far. I was honored by all their presences. My friend Cynthia (as in Roslindale Library Event Organizer) came early and we cooked and baked up a storm on Friday evening. She did the lunches while I taught. Thank you a million Cynthia! 


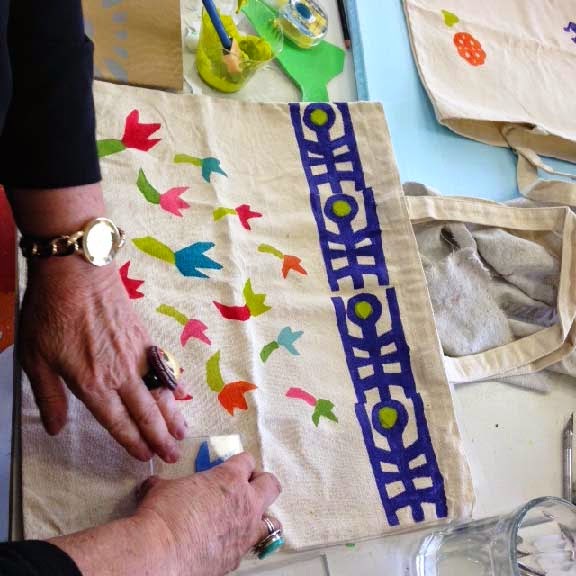
In the morning after a quick tour of the handmade decoration in our farmhouse, I introduced the printing concept, some basic fabric design, the paints and materials. We got right down to work. Here are the girls cutting shapes and building their own individual printing stamps. 


It is a messy process and maybe a bit intimidating if you haven't designed much before. They got through it though - with flying colors. 


We had a delicious and colorful lunch - with Julia keeping us informed of Royal Baby #2 with live-streaming updates.  


After lunch, we went back to the studio to start the fabric printing. This is when the inner artist/colorist in each person came out. I love to see what each student comes up with. Each design was so different from her neighbors. 


As the students worked, I could see the wheels in their heads turning. Some abandoned their original ideas and moved onto new ideas. Some carried through with their original ideas. 


Change and decision making is part of the design and art process and one that I find so important for learning. 


Tomorrow I will share the finished work that the students made. 


This class was such a success - filling up in rapid time. I'm going to offer it again this summer. Maybe you might like to come to the farm and learn how to print fabric. Watch this space. Better yet - sign up for my newsletter on the upper right side of my sidebar. I announce new classes first on my newsletter.  

Kristin Is Now Writing Over on Substack

Hi All! A quick note to let you all know that I'm now writing a Newsletter over on Substack: Kristin Nicholas' Colorful Newsletter f...